Sometimes a picture is worth a thousand words, and at Pressbooks, we want to make sure the images in your book are exported in the best way for print and/or digital formats.
There are some nuances to getting this right, so here’s what you need to know.
Prepare your images
The first step is to determine whether your images will be used in print or in ebook form, or both. If you’re doing both, that brings some special tensions.
For the print version, you’ll need your images to be high-res (300 dpi at the size you want them on the page). This requires the pixel dimensions of the image to be large, but more on this to follow.
For digital, you’ll still want your images to be high-quality, in case users click to enlarge them. However, retailer “digital delivery fees” based on the overall size in megabytes of your ebook will cut into your royalties. And images are the main contributor to your book’s size.
The best way to meet the needs for both print and digital output is to make sure the images are large enough to export at 300 dpi at the size you want them on the page, but below 1-2 MB per file.
It’s important to note that you can’t make an image bigger–you can’t “upsize” an image or make it larger than it is–without it becoming pixelated and unusable. Images that have been casually taken using a phone camera, pulled from the web, or taken via a screen capture, are unlikely to be large enough to export at 300 dpi. To start with a high-res image, adjust the settings on your camera, or purchase or commission the correct resolution of stock image at the outset. (More on how to check your resolution in a minute.)
If you’re only creating an ebook, you should keep images at maximum 250KB.
To make adjustments to the pixel dimensions of your images, you can use software like Adobe Photoshop or other image editing software. Once the image is in Pressbooks, you need to follow some steps to keep the image size and resolution intact, so keep reading!
Resolution: Pixel Dimensions Matter!
Pixel dimensions are crucial to your image quality. Your printer is likely to require a certain minimum DPI for print and may flag your file if the images in the book do not meet this requirement. It is the relationship between the pixel dimensions of your image and its size in inches/centimetres on the page that determine the DPI.
We rely on this formula to determine the size of an image, its resolution, and the corresponding pixel dimensions:
Required image pixel dimensions = ideal size * ideal resolution
Ideal size (example) = 3inx5in
Ideal resolution = 300dpi
Required image pixel dimensions = (3*300) x (5*300) = 900x1500px.
Let’s say you have an image, with pixel dimensions 600x600px. This means that your image will be 300dpi at 2×2 inches on the page – at this size, it is high resolution. If you were to insert this into your book at a larger size, even if just 3×3 inches, it will no longer appear at 300dpi in your PDF exports.
Start by thinking about how large or small you want your image will appear on the page, and calculate the dimensions accordingly. This is one of the best ways to ensure that all the images in your book look good – and to prevent unfortunate surprises!
Sometimes an image that isn’t quite 300 dpi will end up just fine in print. But it may cause your file to get flagged and delayed at a minimum.
Uploading Images & Image Options
Once you’ve prepared your images, you can upload them into the Pressbooks Media Library.
If you are creating a print file, make sure that you set the image to display “Full Size” in your chapter.
If you are also doing an ebook, go to Appearance -> Theme Options for Ebook and check the box that says “Compress Images.”
My Image is in Pressbooks: What’s Next?
Images sometimes get resized slightly in export routines, which may pull your dpi below 300. So if 300 dpi images are critical to your book, there is one more pro trick you should employ.
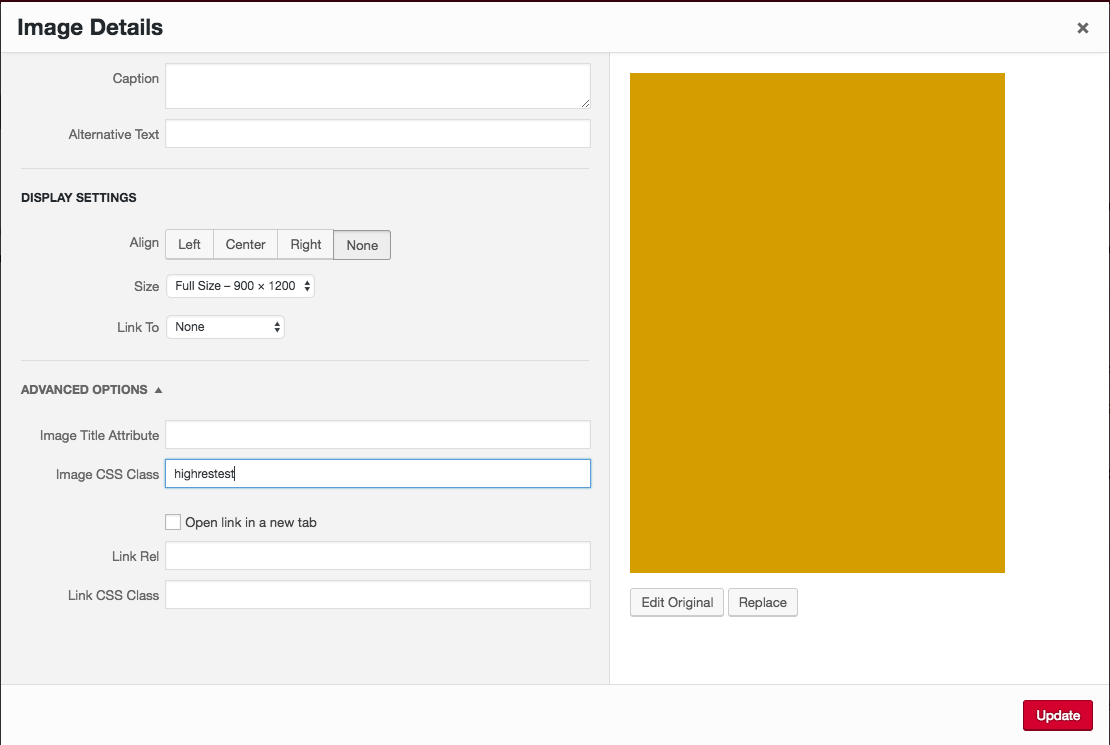
The trick to ensure your image stays at the size you want is to add a Custom Image Class. To do so:
- Click on the image, and open the Advanced Options Menu.
- In the “Image CSS Class” field, enter a name for your custom class (this can be any word, preferably without spaces, such as “highrestest”) and click Update.
- Next, apply the custom CSS theme (full instructions here)
- Go to in the PDF stylesheet, and enter this code at the end of the stylesheet:
.yourimageclass {
width: size in inches !important;
height: size in inches !important; }
Remember NOT to set the image larger in inches than calculated using the above formula, as this will cause your image to display at less than 300 dpi on the printed page.
In the example image above, the code would be:
.highrestest {
width: 3in !important;
height: 4in !important; }
- Click Save.
- Go to the Export page, and test to see whether the code has been correctly applied.
If you’re not sure how to apply the Custom CSS, we’re glad to help. Contact us at support@pressbooks.com.
Testing for Print
The last thing to do is to test and see whether your images appear as they should. To do so, export and download a new print PDF file.
If you have Adobe Acrobat Pro, you can use it to confirm the size, pixel dimensions, and resolution of images in your PDF. Click on Tools -> Print Production -> Output Preview. Click on an image and Preview Object Inspector.
Or, upload your file for print-on-demand and order a proof or author copy. Most POD suppliers will tell you if your images are low-resolution. A proof will allow you to see and judge for yourself if the image is high-quality enough.
If you’ve followed all the guidelines listed above, but your image is still being flagged as less than 300 dpi, email us at support@pressbooks.com and we’ll help you out.